Howard Hughes - Po Invoicing Create Submit Invoice
How to Create and Submit an Invoice
Once you log into Coupa, from the Coupa Supplier Portal (CSP) homepage, invoices can be created two ways:
- From the “Orders” tab
- From the “Invoices” tab
To create an invoice from the “Orders” tab in the blue banner, click on the “Orders” tab in the blue banner and then “Orders” in the grey banner located under the blue banner. The screen below will appear.
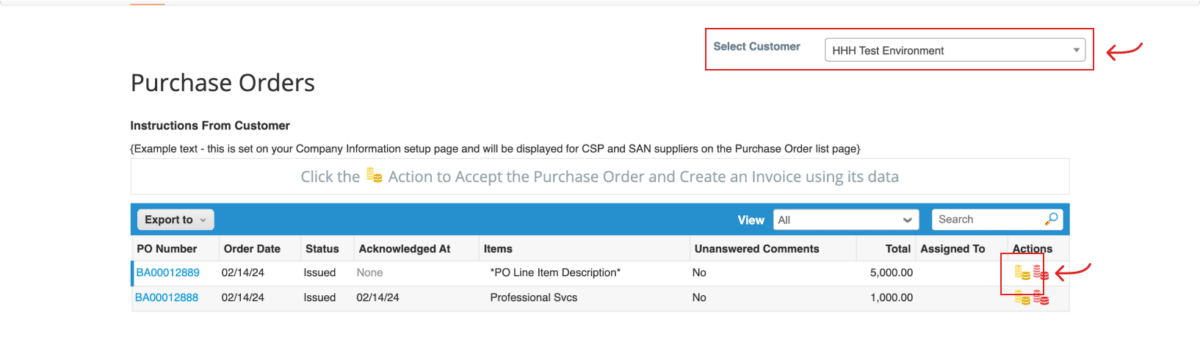
Click on the gold coins icon next to the Purchase Order to create the invoice. Please make sure that “The Howard Hughes Corporation” is selected as the Customer in the “Select Customer” field.
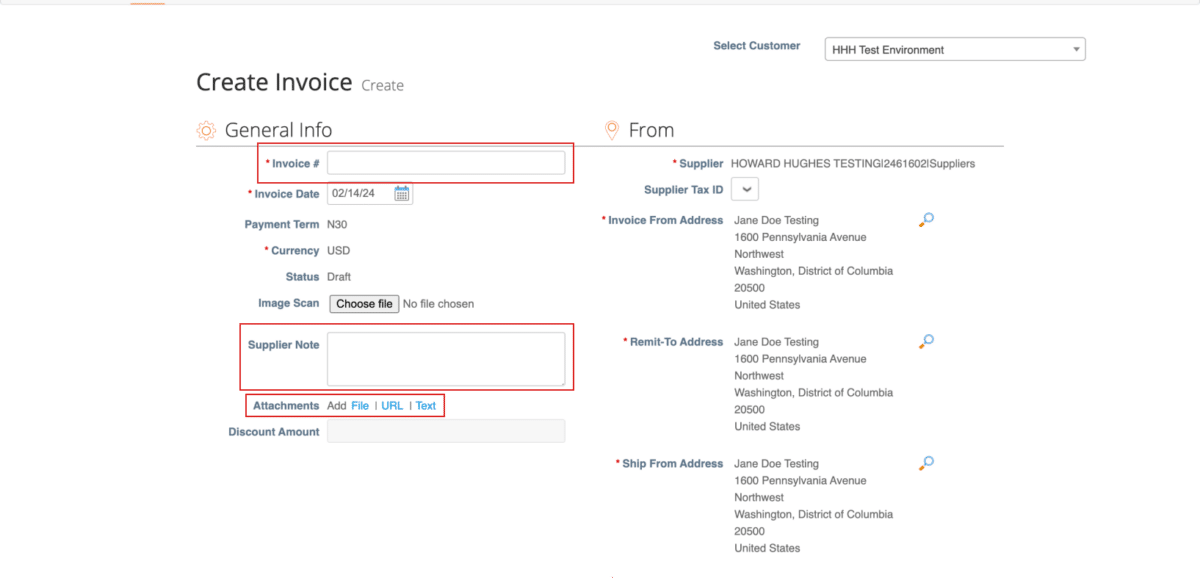
An invoice will open in a new window. Please enter the following information in the Invoice header:
- Invoice #
- Supplier Notes (if any)
- Attach the invoice or any additional documentation by clicking on the File link in the “Attachments” field which can be found immediately below the “Supplier Notes” field.
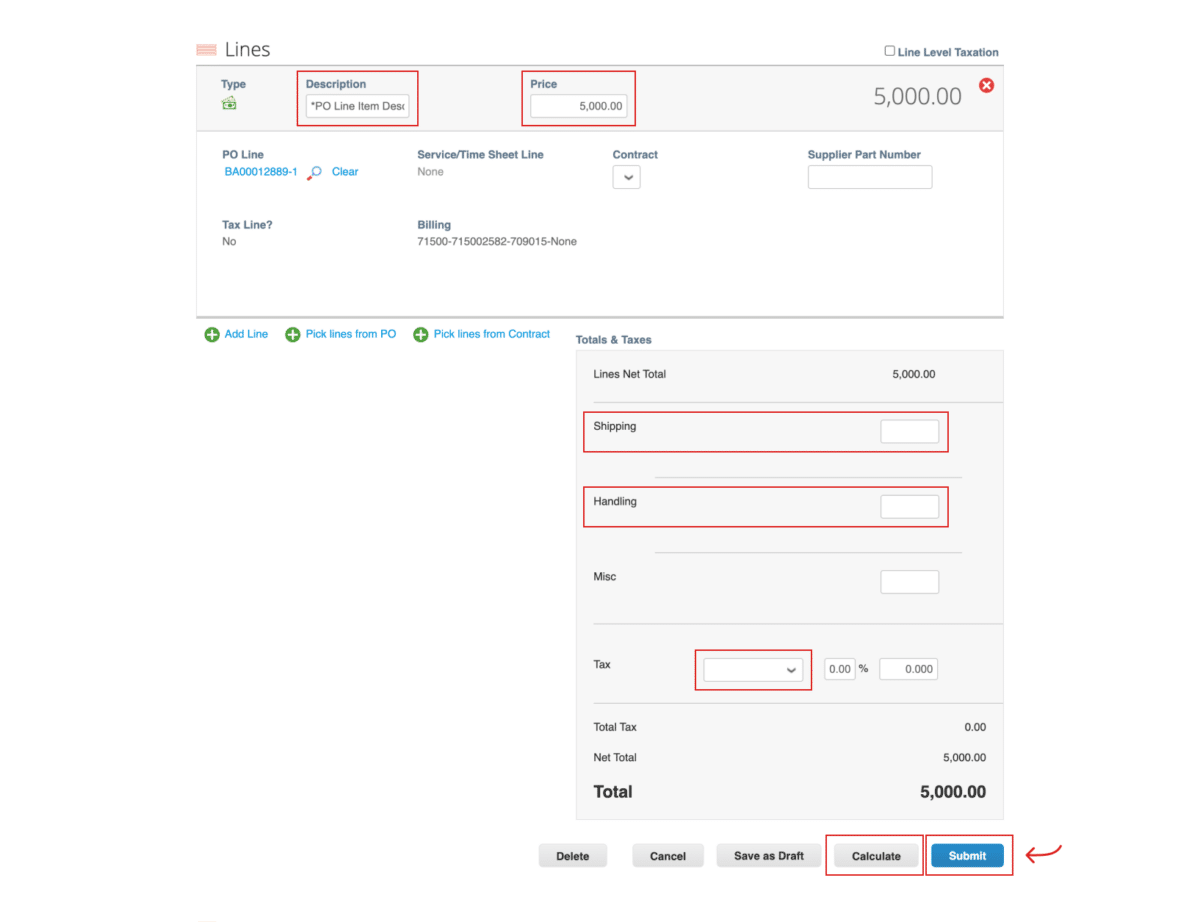
In the invoice line, enter the following information:
- description of the work in the “Description” field.
- price in the “Price” field. If the amount to be invoiced is lower than the Purchase Order, please enter the amount and then click the “Calculate” button at the bottom right-hand corner of the page.
- if shipping cost applies and isn’t included in the total of the Purchase Order line, enter the amount in the “Shipping” field.
- if tax applies and isn’t included in the total of the Purchase Order line, enter the amount in the “Tax” field.
- click the “Submit” button to submit the invoice for processing.
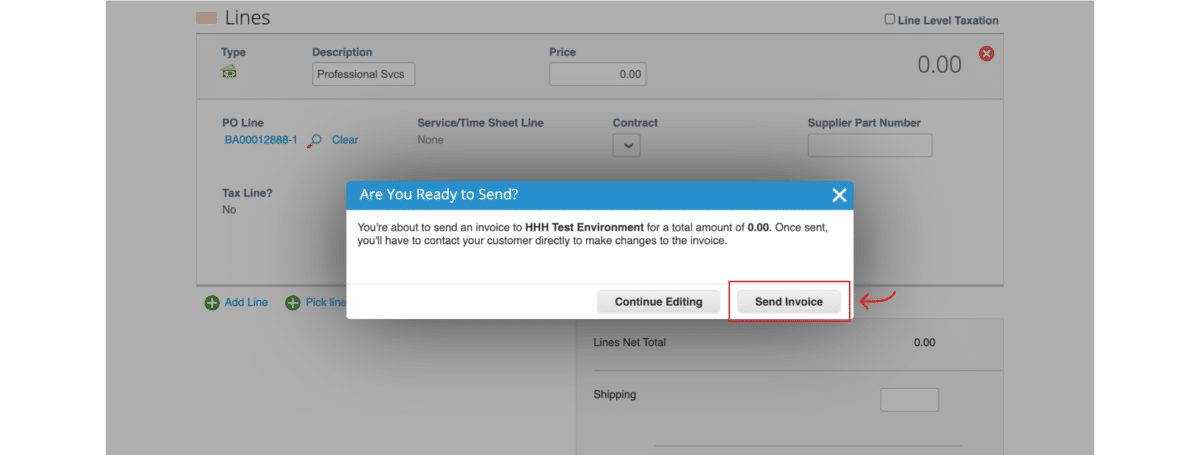
An “Are You Ready to Send?” window appears. If you are not ready to submit the invoice, please click on the “Continue Editing” button. If you are ready to submit the invoice, please click on the “Send Invoice” button.

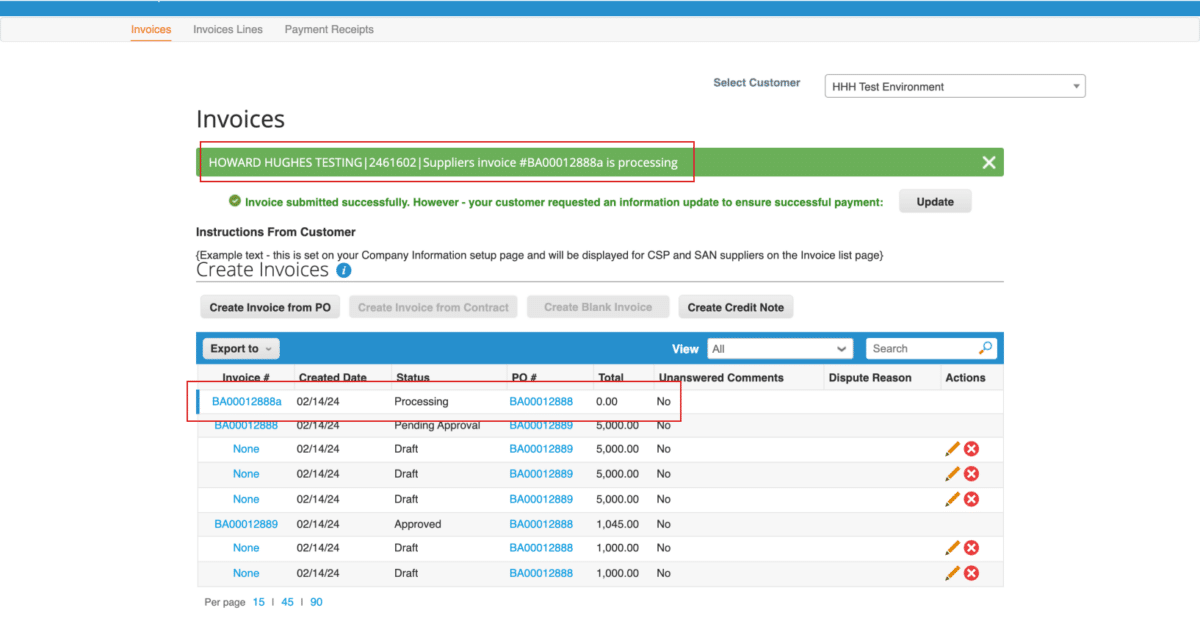
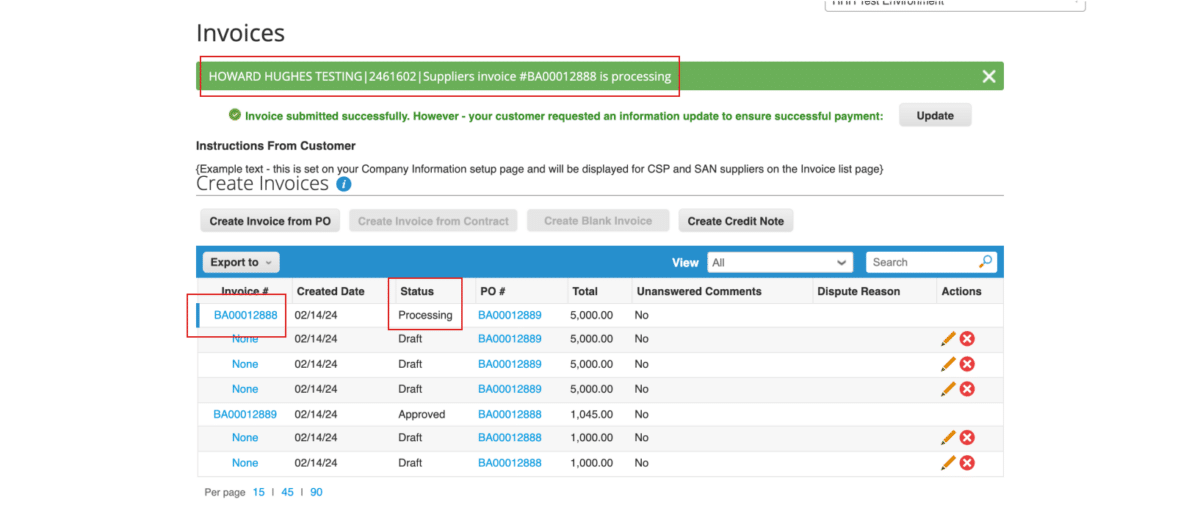
You will receive a message stating that your Invoice is being processed.
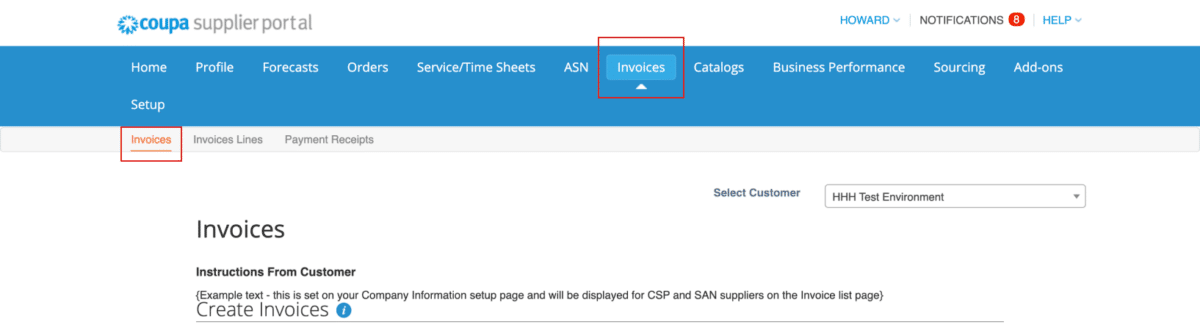
To create an invoice from the “Invoices” tab, click on the “Invoices” tab in the blue banner at the top and then on the “Invoices” tab in the grey banner.
Then select the Purchase Order being invoiced.
Click the “Create Invoice” button at the bottom of the page in the Purchase Order window.

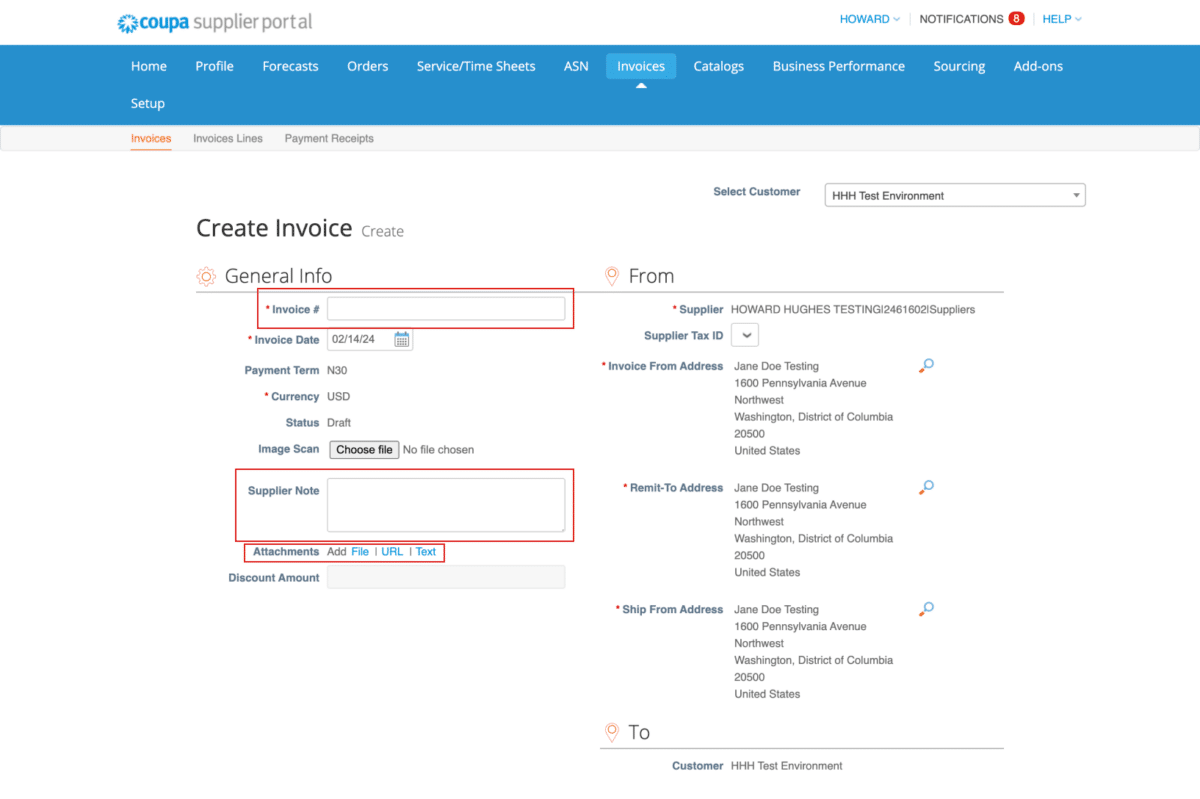
Complete the following information in the Invoice header.
- Invoice #
- Supplier Notes (if any)
- Attach the invoice or any additional documentation by clicking on the “File” link in the “Attachments” field which can be found immediately below the “Supplier Notes” field.
In the invoice line, enter the following information:
- description of the work in the “Description” field.
- price in the “Price” field. If the amount to be invoiced is lower than the Purchase Order, please enter the amount and then click the “Calculate” button at the bottom right-hand corner of the page.
- if shipping cost applies and isn’t included in the total of the Purchase Order line, enter the amount in the “Shipping” field.
- if tax applies and isn’t included in the total of the Purchase Order line, enter the amount in the “Tax” field.
- click the “Submit” button to submit the invoice for processing.

An “Are You Ready to Send?” window appears. If you are not ready to submit the invoice, please click on the “Continue Editing” button. If you are ready to submit the invoice, please click on the “Send Invoice” button.
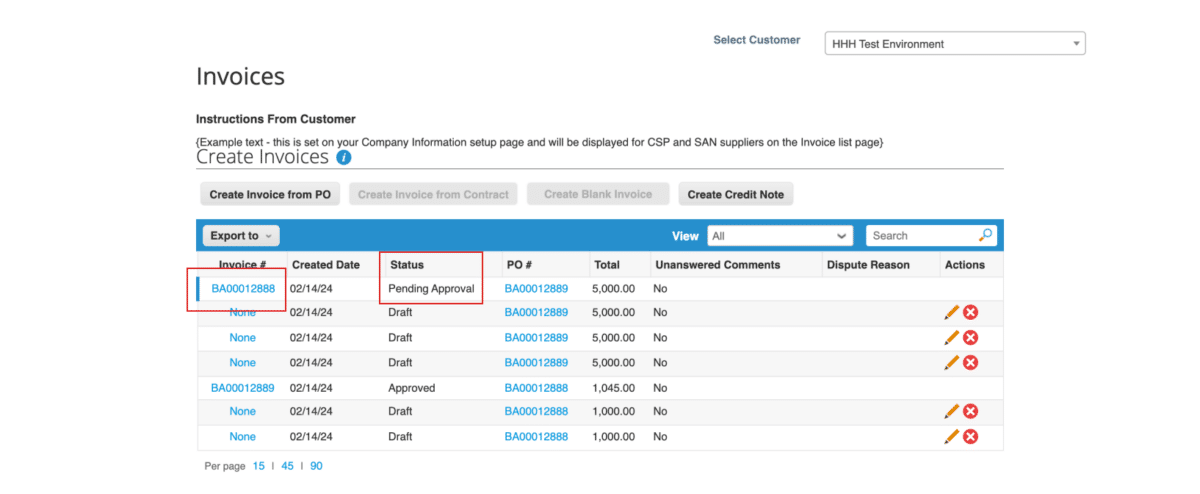
You will receive a message stating that your invoice is being processed.